
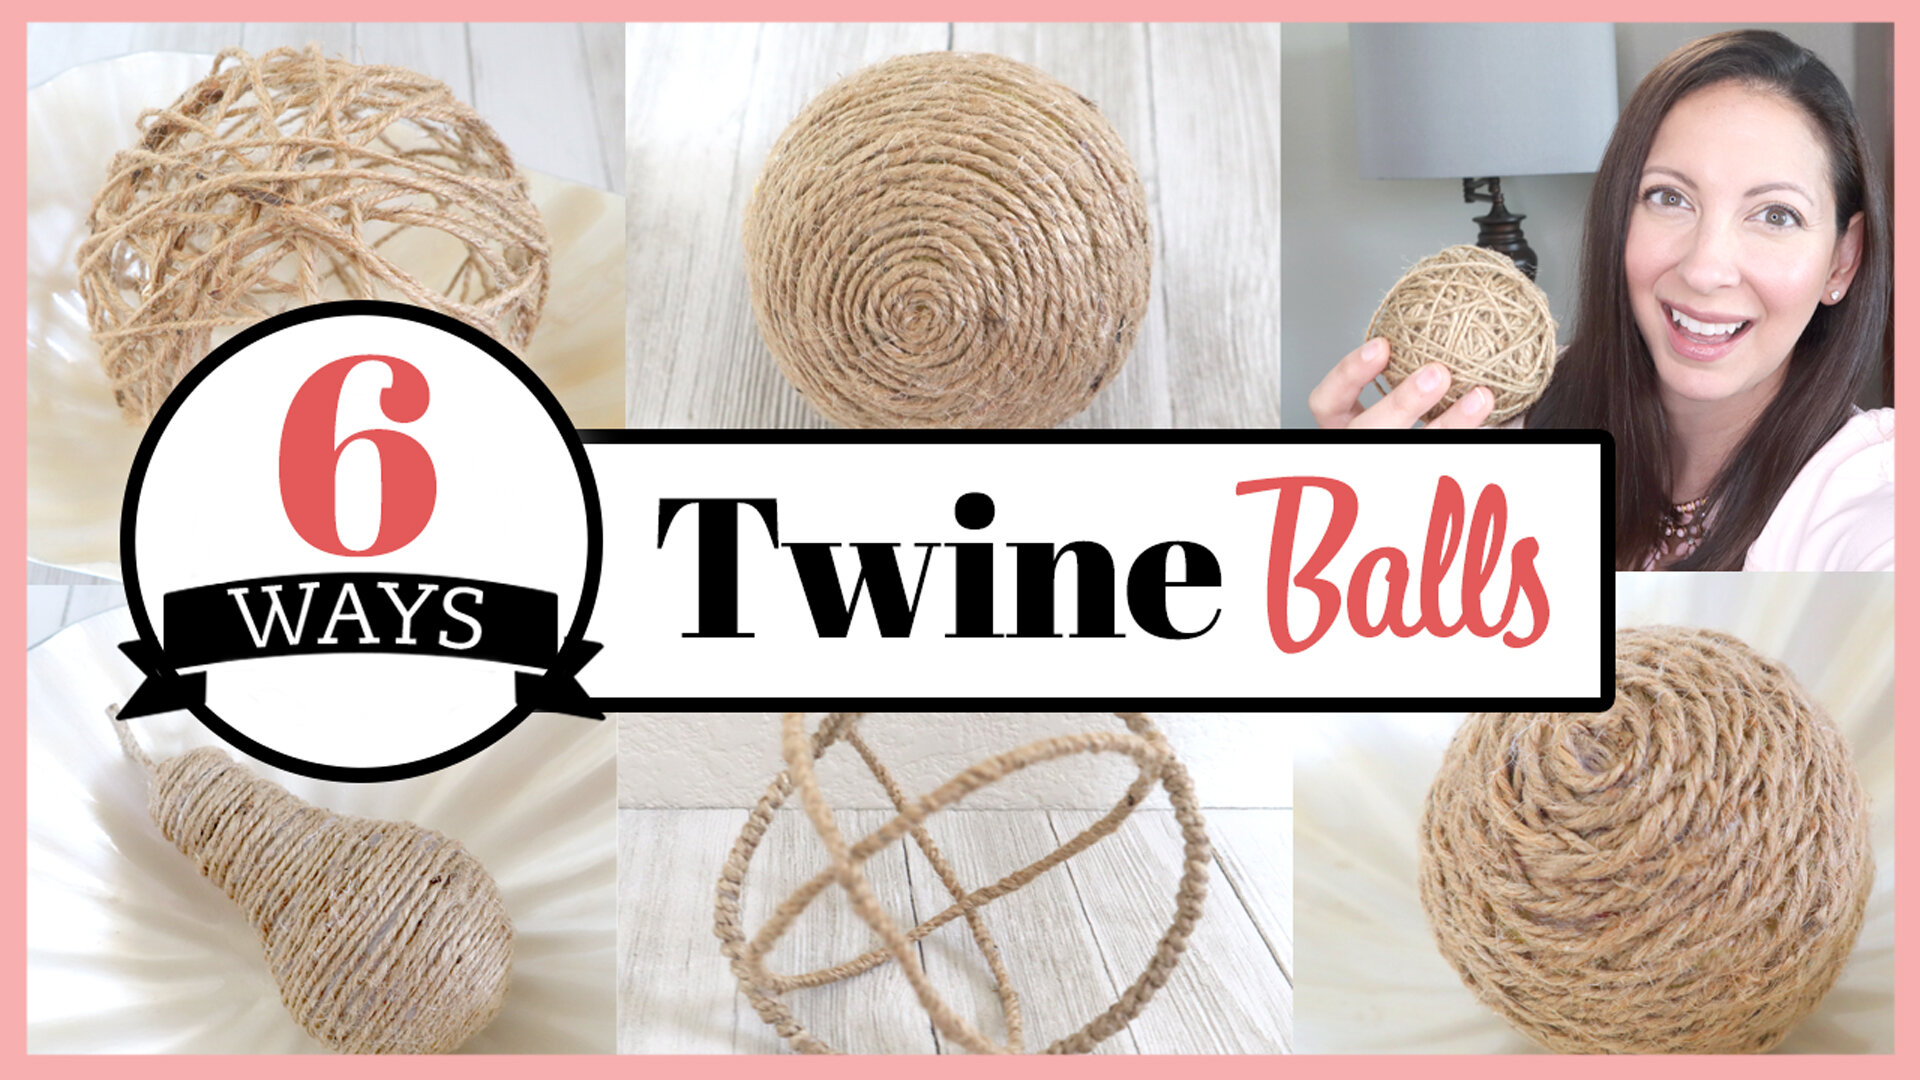
Twine Balls 6 Ways
Twine (or “jute”) balls are great ways to decorate your home. They spice up any empty spot on a bookshelf, can fill up an empty bowl, or just look cute on a side table.
This post will show you how to make twine balls 6 different ways. Plus, I share how to style these decorative jute balls in your home.
I highly recommend watching the video below to see how to make all these with visual instructions.
// twine ball #1
I picked up my twine at Dollar Tree. They come in really large rolls of twine for only a dollar. I went through about one and a half of these for all my projects today, so you get a lot of twine for one dollar!

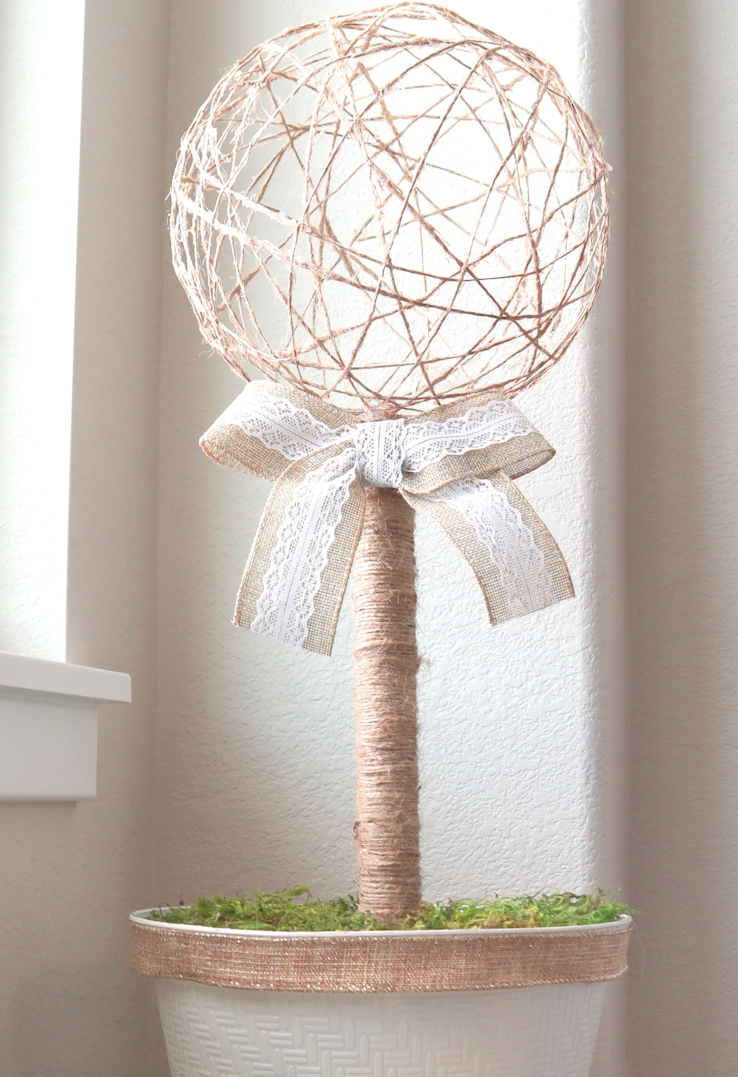
I had made these topiaries awhile back and these are basically really large scale versions of what our first twine ball will be. For the original post showing the larger versions, click here.
For these small ones, we’re going to start with balloons. I blew them fairly small and tied them up.
I got a bowl and filled it with clear Elmer’s glue. I like this glue because it will dry clear and is non-toxic.

Since we’ll be using our hands for this part, you may want to take off any jewelry and make sure you have all your supplies ready before getting started with handling the glue.
You can either work in small sections of twine, wet with glue and then stick them to the balloon.

Or you can wrap the twine around the balloon and then smear the glue right on top of the twine when it’s in position.

I like to let these dry overnight, so they will get really stiff.
The balloon will stick to the dried twine, so the first thing to do is unstick everything so that when you pop the balloon it won’t make the twine deflate with it.
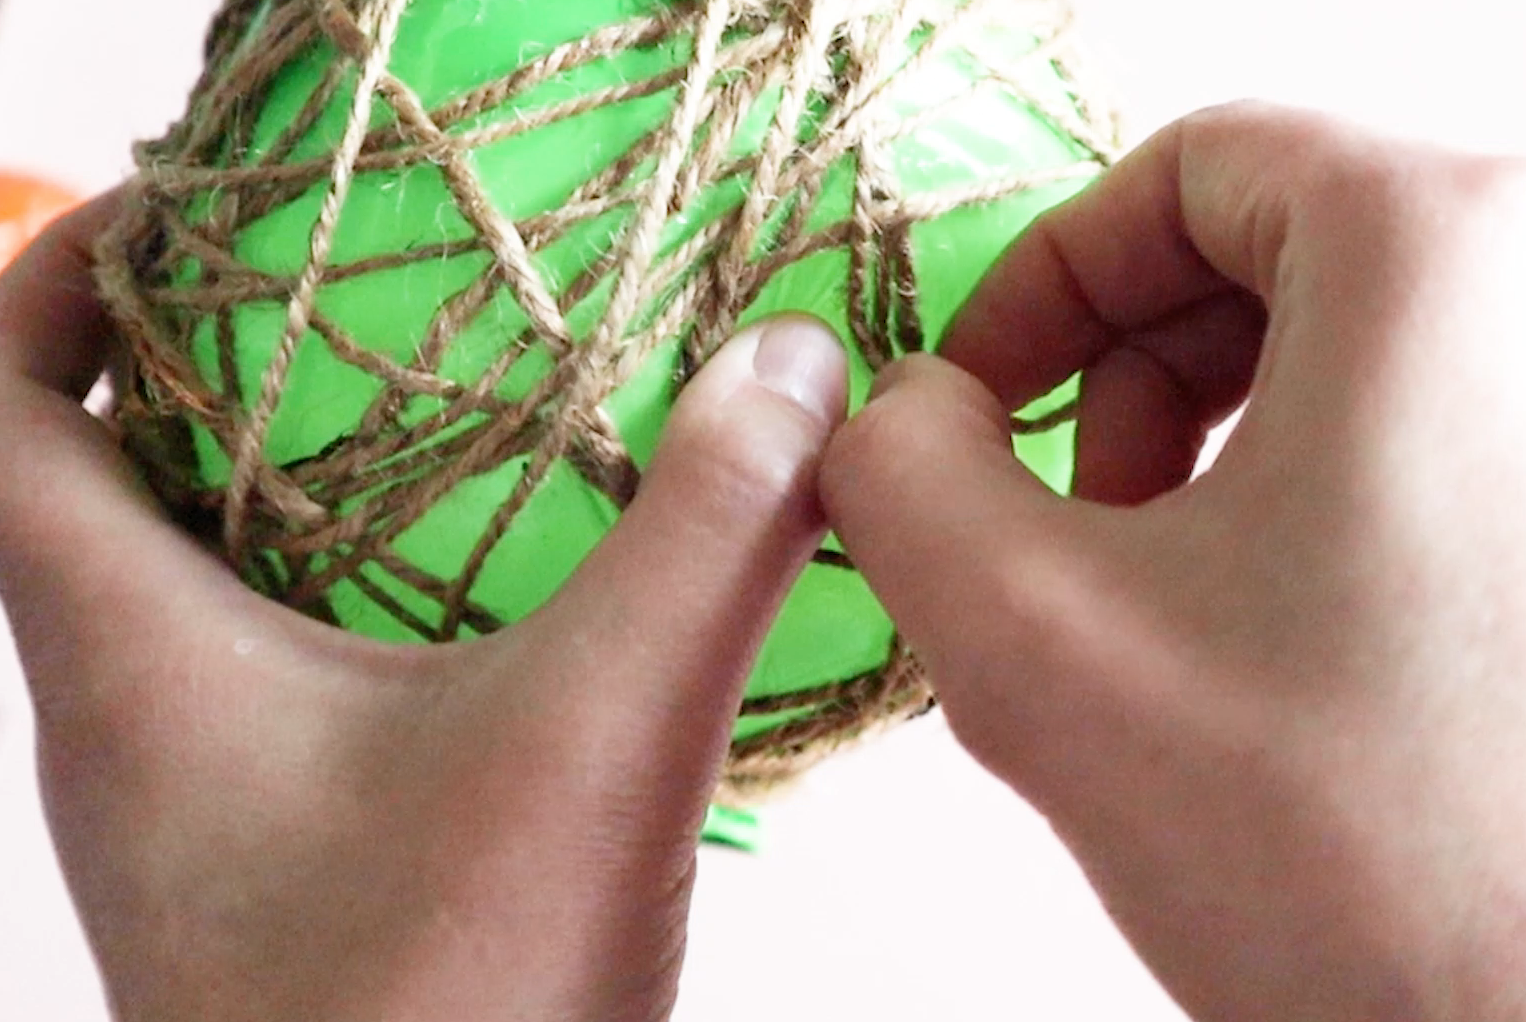
After loosening it as best you can, then the fun part is popping the balloon. It will deflate and then you can pull it through one of the holes in your twine ball.

There will be some glue leftover, just use your finger or scissors to pull those big sheets of glue off.


// twine ball #2
For this one, you will need some pieces of thick floral wire. Hot glue one end of twine to one end of the wire. Make sure it is nice and dry before you start wrapping the twine around that wire.
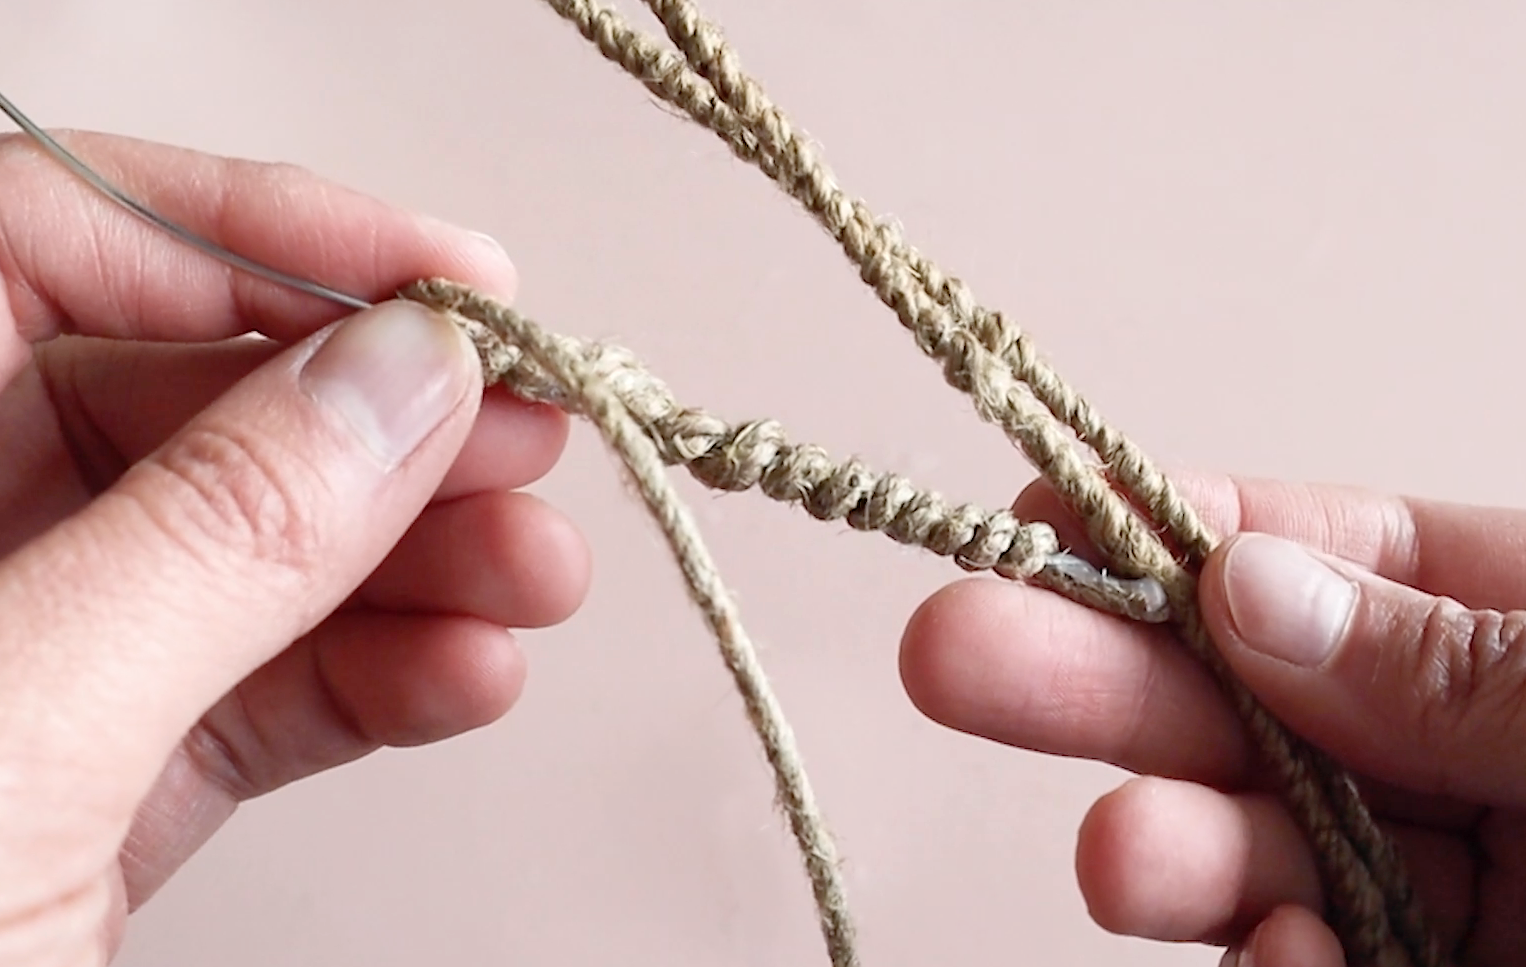
I add a little glue every 10 or so twists just to make sure everything stays in place. Then when you get to the end, add another big dollop of glue to secure the other side. I repeated these for the other wires and did one with slightly thicker twine than the other two. This isn’t necessary, but I wanted it to mix it up a bit.
Form these into circles and then glue together to create a little twine orb.


And here is how our finished twine orb came out!

// twine ball #3
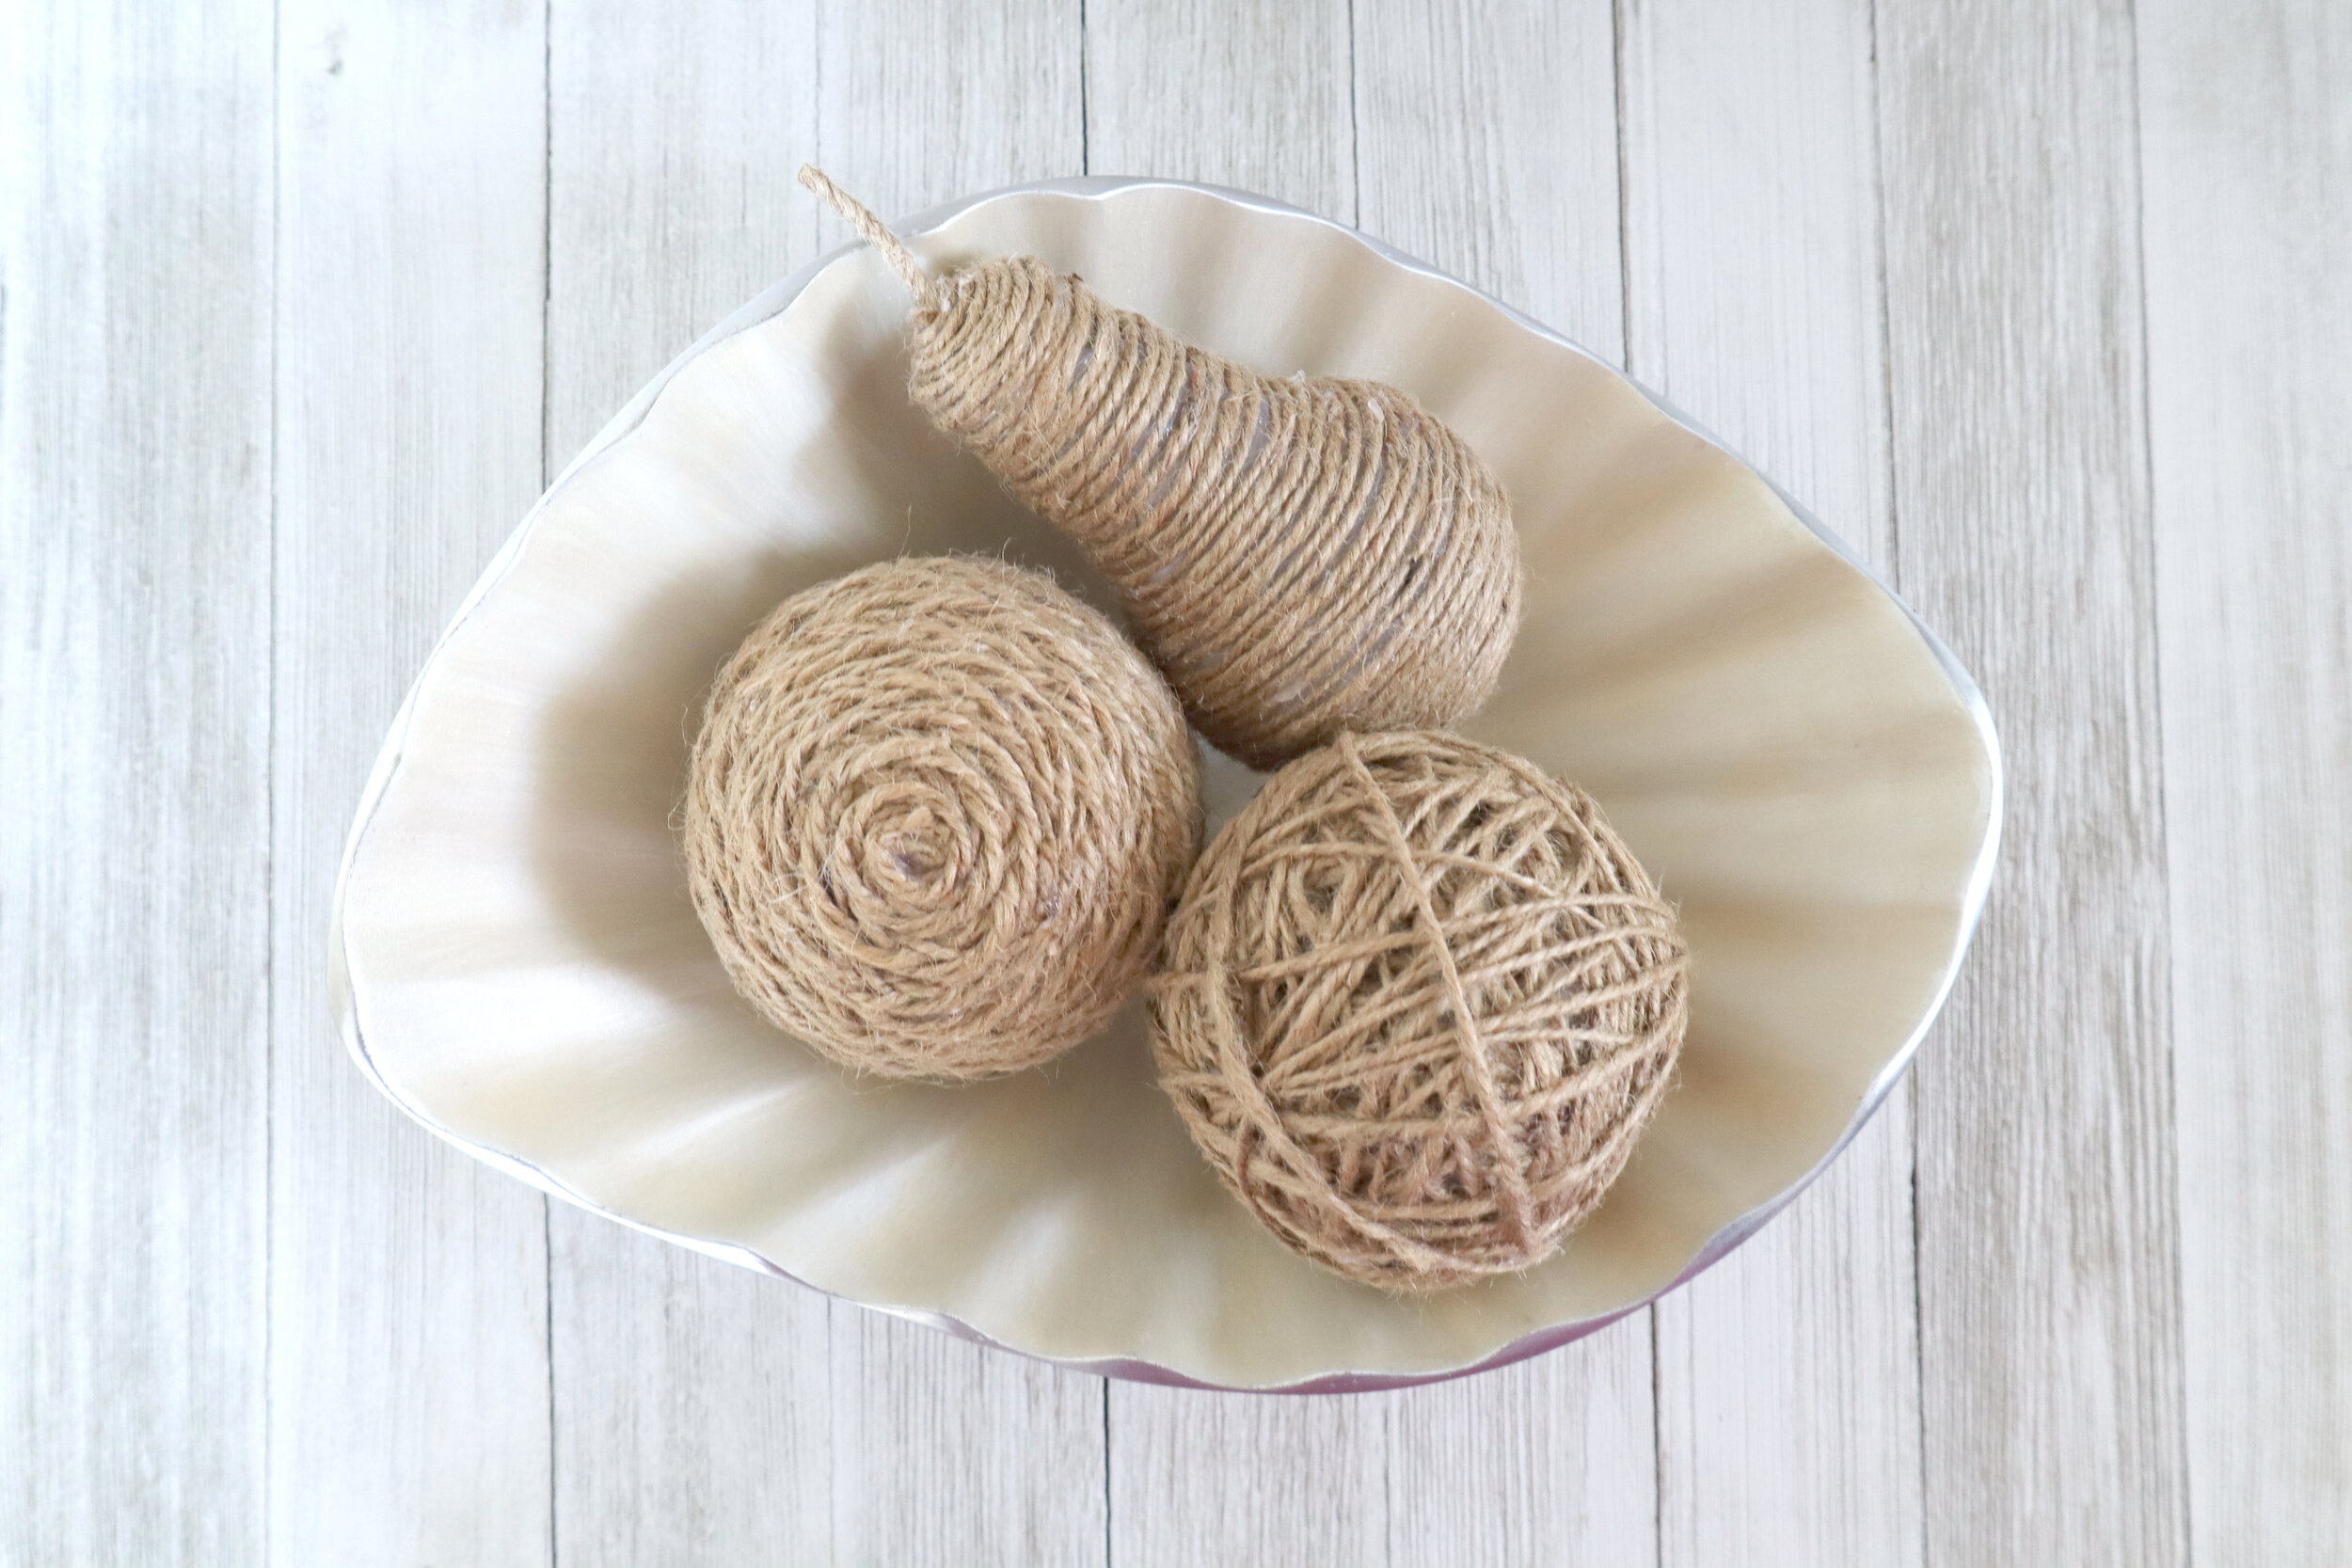
This next one is super easy. We’re going to make a cute little twine pear. You just need a lightbulb and your twine.

Start at the top of the bulb and create a little loop. Keep looping all the way around the lightbulb.

Stop before you get to the very end and add a thicker piece of twine to the middle area with a dot of hot glue. Then, finish wrapping the twine around to conceal that glue.
I like to trim all my twine projects at the end, because there are always those little stray pieces that pop up when you’re working with twine.
So, if your project looks a little scraggly, just give it a quick trim.
And here’s how our pear turned out!

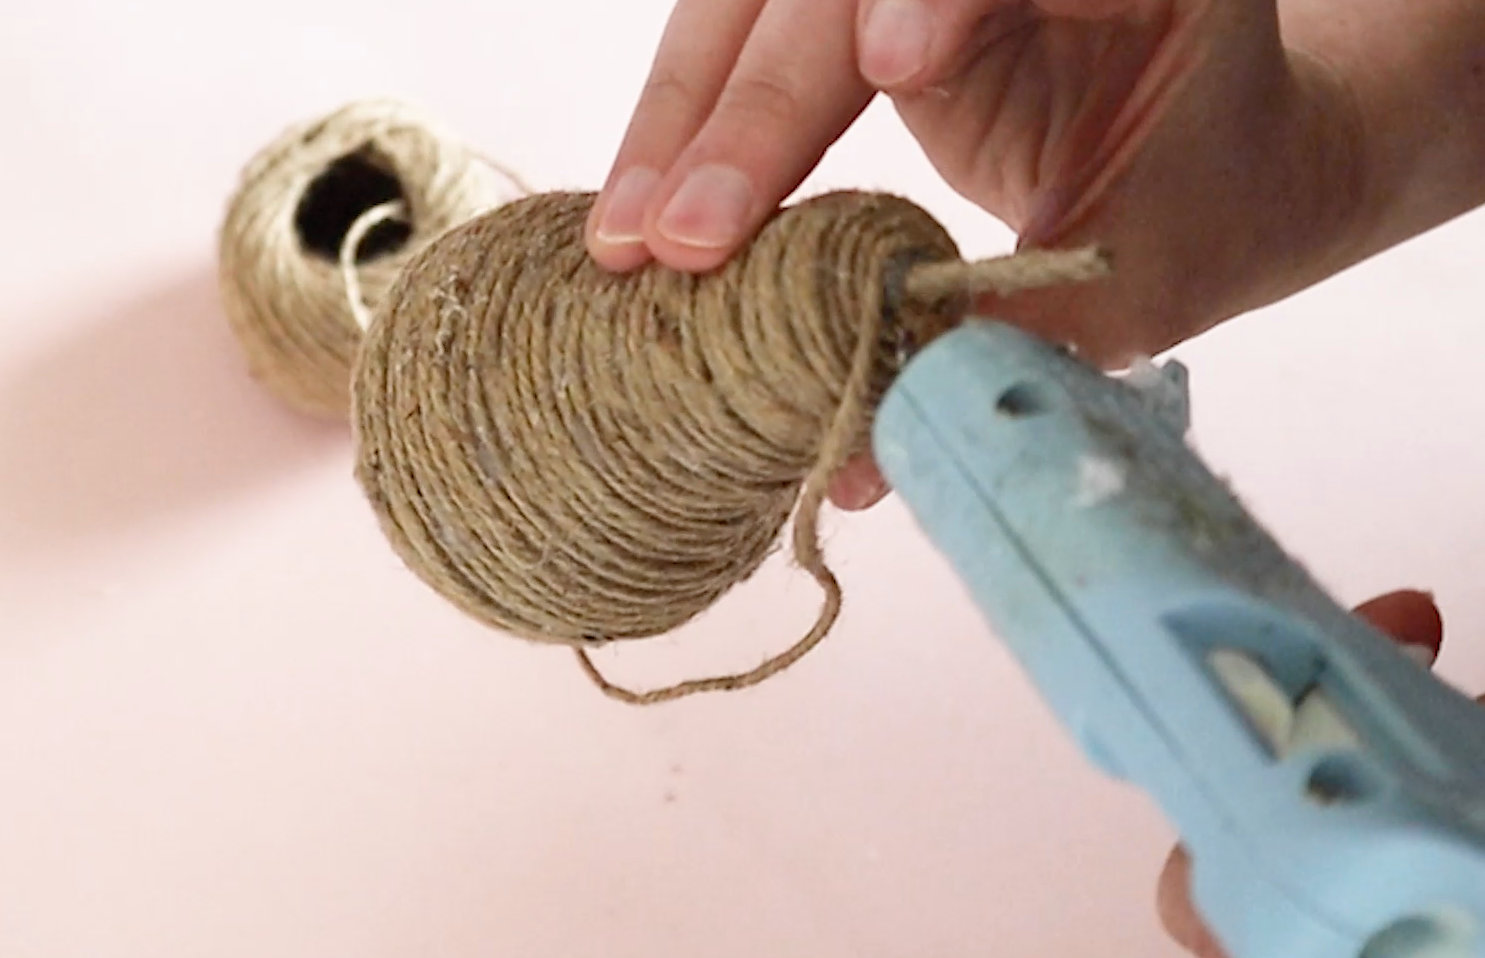
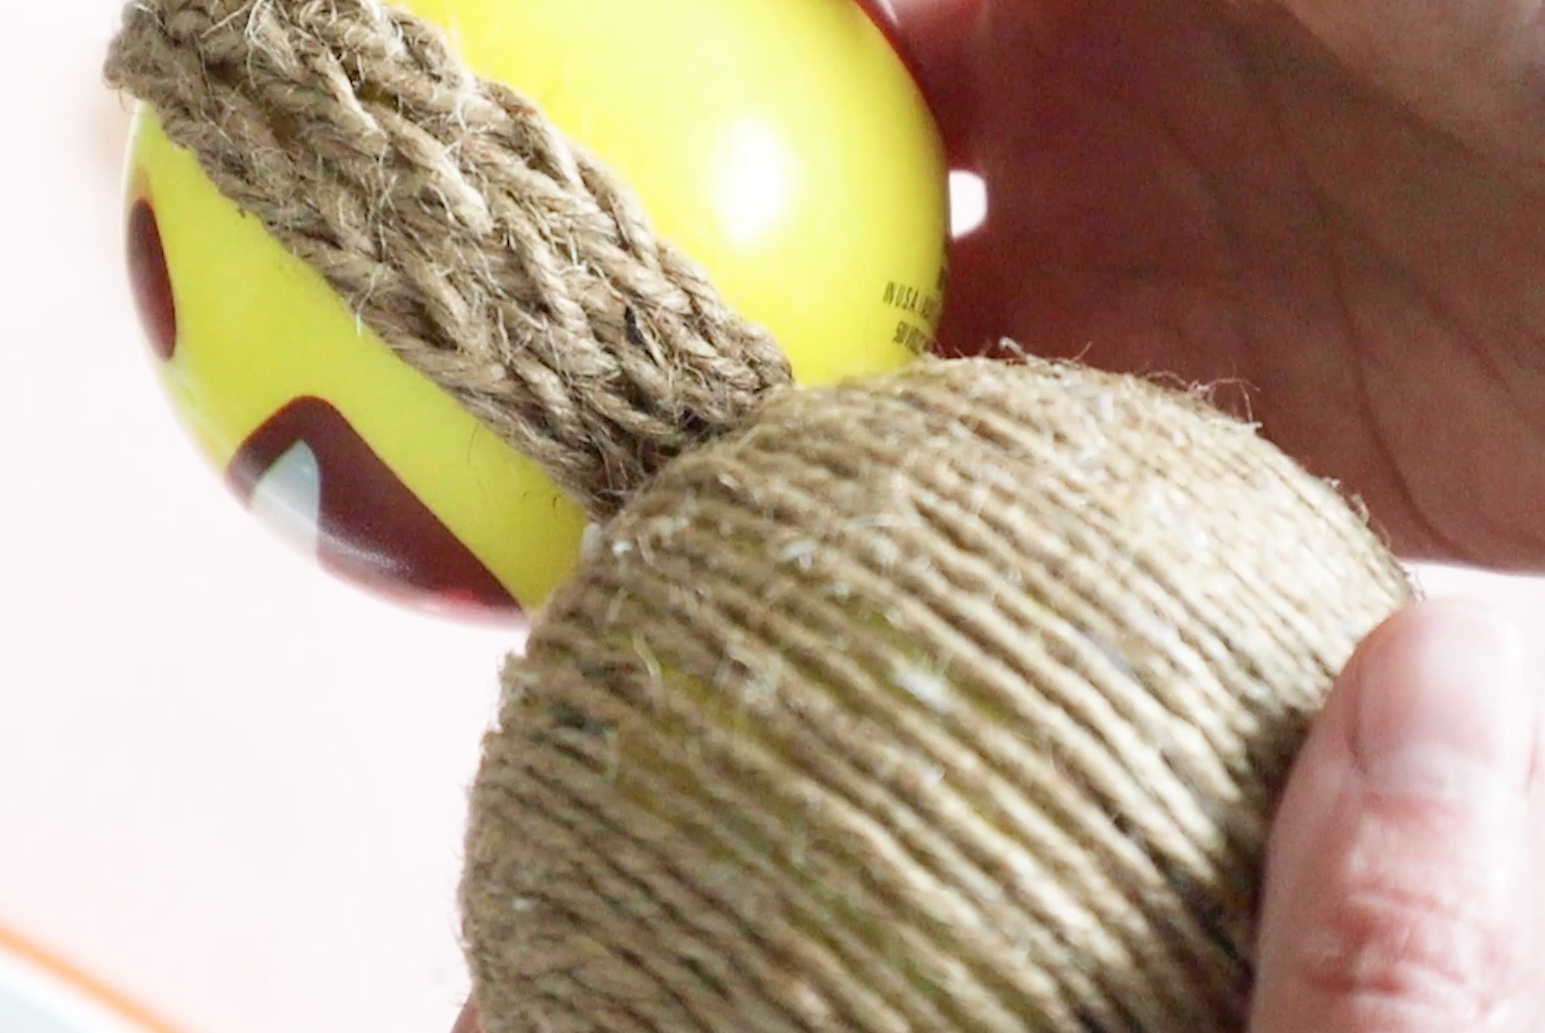
// twine ball #4
The method for the next one is really similar to how we created the pear, except we’ll be using this foam ball I found in the toy section at Dollar Tree.

Using hot glue and evenly wrapping all the way around will create the look we’re going for.
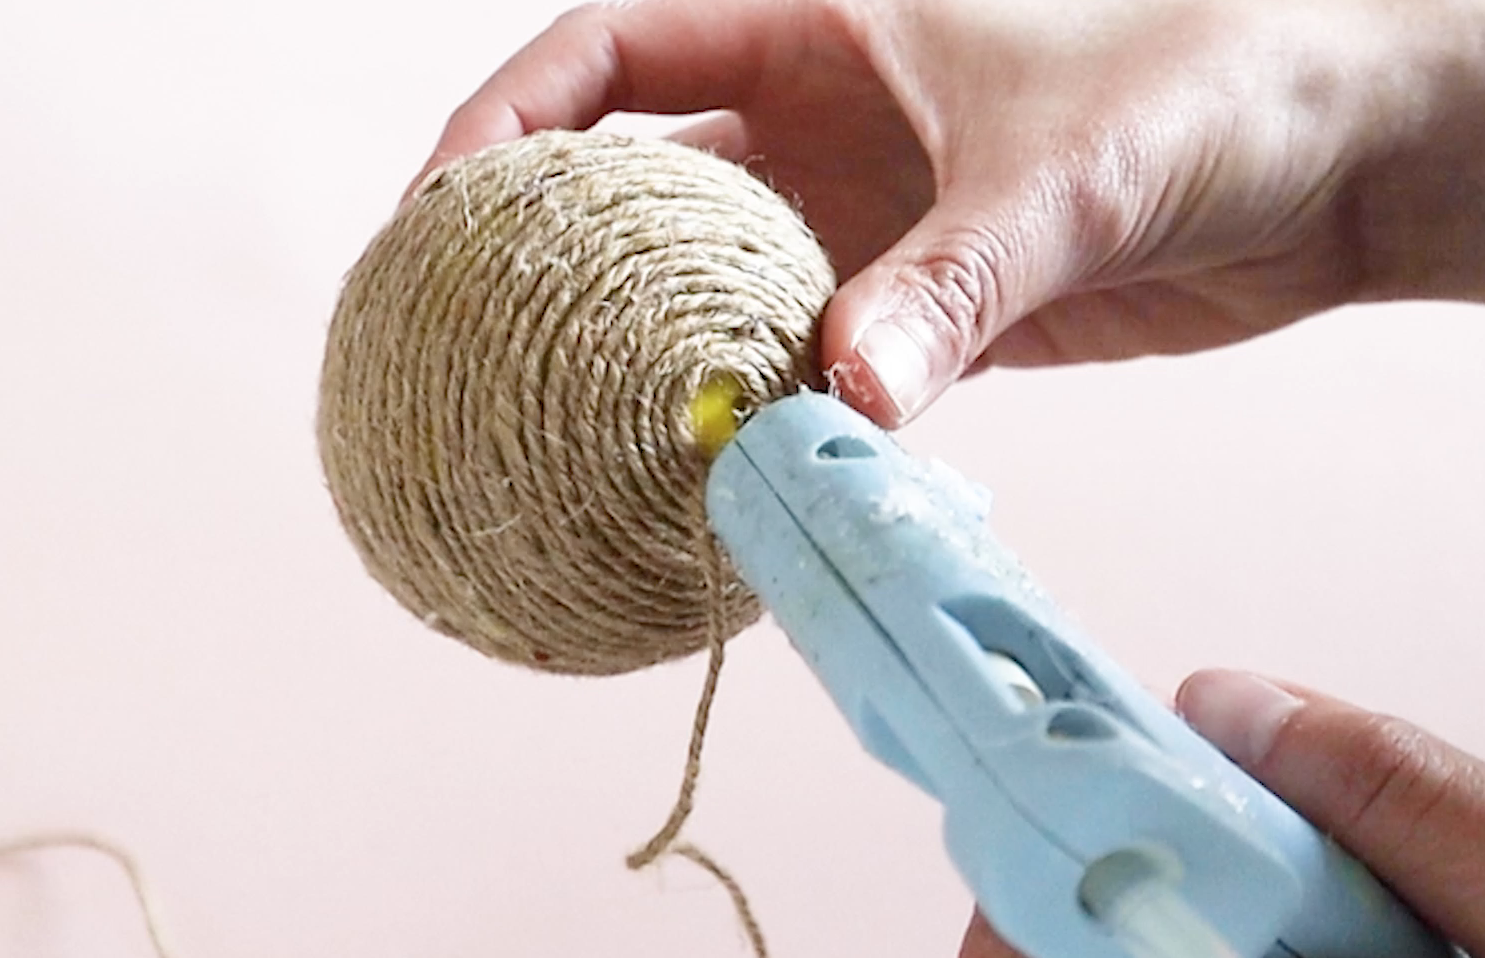
It’s amazing how just wrapping a $1 ball with twine made it look like a high end piece of decor that you might find at Pottery Barn!

// twine ball #5
You will need 4 long pieces of twine cut to the same length. Tie a knot at one end.

Place the end under something heavy to hold it in place while you braid.

I’m going to do a 4 strand braid because I like how flat this lays when we’re done. You could do a regular 3 strand braid if you like.
You take the two outer sides, cross them in the middle and then take the 2 outer sides cross them in the middle and keep repeating this over and over again.

The hardest part is remembering to unravel the other end as you go along because it gets all knotted, if you don’t unravel the opposite side as you go along.
I wrapped the completed braid in the middle and just glued down the braid, so it was nice and flat against that ball.

You can see what a different the braid makes, when you compare it to the ball where we simply wrapped the twine around it. Both look nice, but the braid definitely adds something extra!
When you get to the end, just trim off that knot and glue down the ends. When you start a new piece, just attach it as closely as you can to the other piece and it should barely be noticeable where the ends meet.
And here is the finished ball.

// twine ball #6
This last one is the easiest of them all, and don’t forget after this one, I’ll share a couple ways you can decorate your home with all these twine balls we made.
There are a couple different things you can use as the base. Either one of those squishy toy balls we used earlier. Or you could go with a styrofoam ball. If you don’t have either of those, just squish up some newspaper or regular copy paper like I have here and form it into a round shape.

Then just wrap, wrap, wrap. Check in about halfway through to make sure it is as round as you want it to be. Sometimes, during the wrapping process, the ball can get a little lop-sided, so you may need to squish it into shape.

At the end, I tried to find a slightly thicker area to end it so that I would have more surface area to glue down. I used a skewer to help hold down the hot glue as it dried.

// let’s decorate
There are so many wonderful ways to use these decorative twine balls. You could place them in a bowl and use as decoration that way.

I like to stack books as decoration, like this, which is on my entry way table and then have either some paper hydrangeas I made, or twine balls on top of the books for added height.

If you’re looking for ways to dress up some bookshelves, these are perfect to fill any empty spots in the bookshelf.
I also like using a cake serving platter to display the twine decor.

If this post inspired you, then you may like these below. Thanks for reading and I hope you have a creative day!


FTC: Not Sponsored. All opinions are always 100% honest and my own. Some links may be affiliate links. If you click a link and buy something, I receive a small commission for the sale. It doesn’t cost you anything extra and you are free to use the link or not as you choose. If you do use my links, I appreciate your support.
How about some Target Dollar Spot crafts and Dollar Tree coastal transformations. We’ll be putting together tiered tray miniatures to decorate our little coastal vignette.